[5 minutes read]
Quick links:
- Solid hardwood
- Engineered hardwood
- Laminate flooring
- Installation process
- Why you should go for wooden flooring?
- Some best Indian brands for wooden flooring
Wooden flooring is a common choice as a flooring material and comes in various styles, colors, cuts, and species. It is used as flooring, either for structural or aesthetic purposes.
Bamboo flooring is also considered a form of wood flooring, although it is made from a grass (bamboo) rather than a timber.
Types of wooden flooring:
1) Solid hardwood:
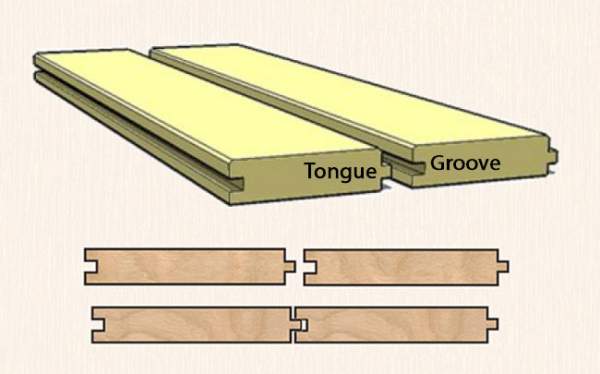
Solid hardwood is attractive, timeless and adds that visual appeal to a home or business, thereby appealing for potential buyers/tenants. Solid hardwood floor planks are made from a piece of wood which are usually 18-20mm thick and the boards are made with a tongue and groove that fit together which makes it easy during installation.
Certain floors will be harder than others, depending upon the species of the wood used. All types of wood have a hardness score, which indicates how easily they can be damaged by everyday wear and tear.
The advantage of a hardwood floor is that it can be sanded and refinished several times to restore its beauty and freshness.
Solid wood floor swells in moist conditions and contracts as the area dries and therefore can alter the appearance of the floor which may cause problems. Solid wood flooring can amplify sound, so rugs are a good option if you have boards upstairs.
It’s tough to install because it has to be glued or nailed down. Fitting the individual boards together can be difficult because they change shape after they’ve been manufactured and they are costlier than other types of wood flooring.
Some of the different type of hardwood available:
- Maple
- Ash
- Mahogany
- Oak
- Rosewood
- Walnut
- Cherry
- Pine
- Hickory
2) Engineered hardwood
Engineered hardwood flooring comes in a variety of styles and is made using three to four layers of wood glued together to create a thick plank. A real-wood veneer is applied to the top which means it can be sanded and refinished a certain number of times to remove signs of damage, wear and tear.
Engineered wood flooring is a more stable product than a piece of solid wood and is less prone to changes from temperature and humidity. It is more attractive than a laminate floor and less expensive than solid hardwood floors.
It’s sometimes available with a ‘click-and-lock’ installation, which doesn’t require any adhesive. Tongue-and-groove versions will need to be glued into place.
3) Laminate Flooring:
Laminate flooring is a compressed fibreboard plank, covered with a photographic image of wood grain, stone or tile pattern over it, with a protective overlay to prevent damage and add a finish to the flooring.
Laminate is a cost-effective option and a wide range of imitations of natural materials are available in the market. You can choose the click-lock designs as they are easy to install.
With all its positive qualities, even the best laminate won’t be able to match the look and feel of real wood floors. The joints wear considerably over time; the laminate is easily damaged by moisture and it is not easy to repair when damage sets in.
If the laminate is not laid correctly, it will not be appealing to potential renters or buyers.
Let’s have a look over the installation process of wooden flooring:
If you are installing a solid hardwood floor, let the wood acclimatize for the moisture level of your home by keeping it idle in your room for 3-4 days. As temperature affects wood, try to install the flooring when it is neither too hot nor too cold.
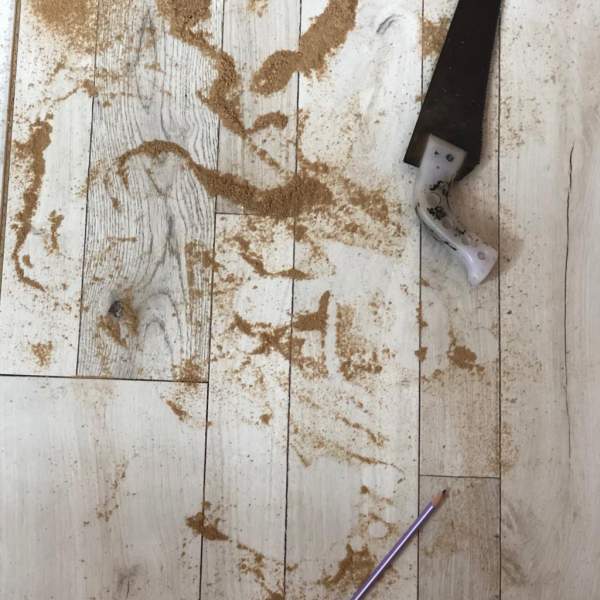
You will need the following tools and supplies:
- Safety Glasses/Dust Mask
- Tape Measure
- Pencil
- Utility Knife
- Carpenters glue
- Undercut saw
- Hammer (If you are installing the floor yourself, use a set of nail guns to speed up the process, you can rent one)
- Adhesive tape
- Chisel
- Circular or Table Saw with carbide tip blade.
- Knee Pads for making the process more comfortable
1) Verify and prepare the sub-floor:
Before starting, make sure that the surface on which the wooden flooring will be installed is flat so that the new flooring will be flat as well. The sub-floor should be clean, dry and all glue or debris must be removed. Lay a foam over the sub-floor as it will absorb the pressure.
2) Measure the room:
For a nice wooden flooring installation, it is important that the first and last planks have the same width or are approximately equal in size, and the length of the first and last planks should be approximately equal, as well.
To have end planks with the same width, divide the area of the room by width of one plank. If the remainder is less than 12 inches, divide it by two and this will be the width of both planks. Repeat the procedure, this time measuring the length of the room.
3) Lay down the first board, tongued-edge facing out into the room. The board should leave a small gap at the wall for expansion and be placed in line with the room. Place spacers in the gap.
Guidelines can be placed by finding the center point of each wall and marking a line between them, creating a cross at the center of the room.
Where one of these lines meets with the wall, mark the manufacturer’s recommended expansion distance and then draw a line at that point which is perpendicular to the centerline.
4) Nail the boards to the subfloor appropriate. Lock your boards together. When the first row is done, place the next board so that the tongue of the first fits into the groove.
You will want to place the boards so that they are offset, beginning six inches or so from the ending of the previous board. Use a mallet and tapping a block to tap the boards together and create a tight seam.
5) Continue until you have completed three rows. You will nail the first three rows just as described in Step 2.
6) Since you are staggering boards, you will likely need to cut boards in order to fit in the gaps at the end.
Measure the distance that it needs to be, keeping the expansion gap in mind, and then (with the board face-down) cut it using a saw.
7) Once you have enough space, you should begin using the flooring nailer (though you could technically do the entire floor with the hammer and nails).
8) You will eventually run out of room to use the flooring nailer. Hammer the last few rows the same way you did the first ones.
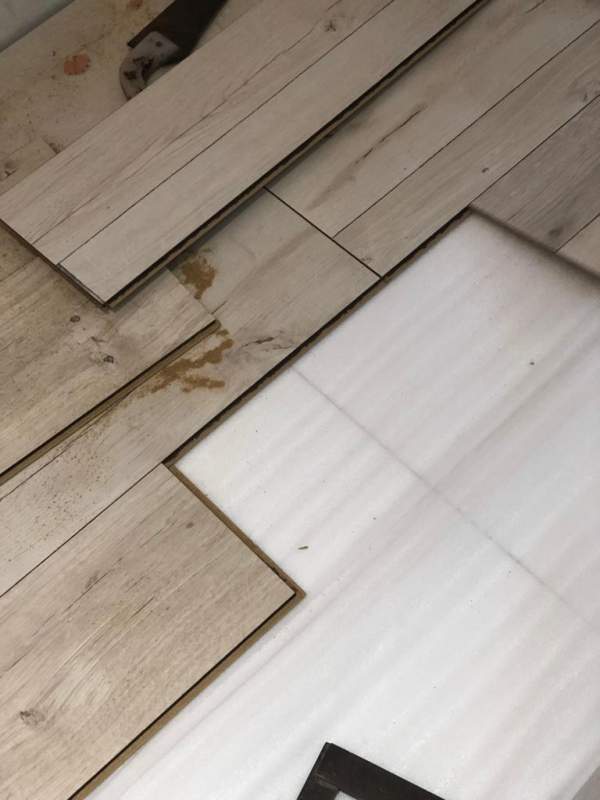
9) If it does not fit properly, you will need to cut the final board so that it is narrow enough to fit.
10) Since you will not have enough space to tap them with the mallet, use a crowbar instead to wedge them into place. You are now ready to finish your floor.
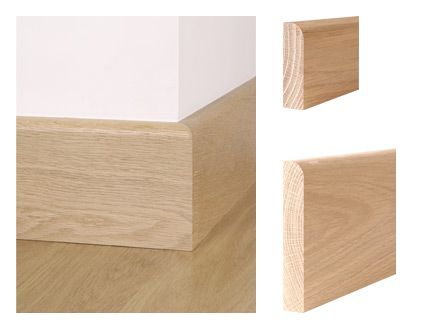
11) Once the floor is in place, you can add some type of baseboard trim, usually a type of molding, where the floor meets the wall.
12) Add trim and transitions anywhere where your floor does not meet up with your walls, such as doorways or a section of the room with different floor covering.
Trim and transitions should be cut to size and installed according to the manufacturer’s instructions. This is usually a very simple process.
13) If you wish to, you can cover the holes created by the nails with nail putty. Such holes can collect dirt and other undesirable material. Be sure to get putty in the color of the wood you are using for the floors, as this will help it blend in.
Some brands serving good quality wooden flooring in India:
Check out our works on Instagram and Facebook